Animation Basics
Let's learn about the basics of animations in snappify Slides.
snappify Slides enables you to create beautiful animations with ease. It comes with smooth transitions out-of-the-box and gives you the ability to adjust them to your liking.
Let's dive into the mechanics of animations in snappify Slides 👇
Animation Order
By default, all animations on a slide will be played at the same time. Some might start later than others if you specify a different delay, but they will all be played simultaneously.
However, you're able to change the order of the animations on the Element Tree in the "Animations" Tab. You can reorder them via drag an drop:
Video showcasing how to rearrange the animation order
If you instead want to reorder the z-index of your elements, please take a look at the corresponding Docs.
At the moment it's not possible to reorder the animations of child elements inside a group.
It's also not yet possible to set an Animation Trigger for those elements, they will always play their animations together with the parent group.
But just changing the order of your animations won't change much, as they will still be played at the same time. Let's a have a look at Animation Triggers to change this behavior 👇
Animation Triggers
By default, an element plays its animation together with the previous one, means at the same time. But you're able to change that.
You can set the following Animation Triggers for each element:
- With Previous: This is the default. The element will play its animation together with the previous one.
- After Previous: With this setting, the element will wait to for the previous element to finish its animation before starting its own.
- On Click: Here, the element will only play on click (or on Arrow key) in presentation mode.
If you're exporting a video, you can specify the duration of the click to trigger the animation in the video export options.
Keep in mind that you could still specify a delay for the animation of each element which will be applied on top of the chosen Animation Trigger.
With these Animation Triggers, you can give a real meaning to the order of your animations.
E.g. all other elements which come after an element that has an "On Click" trigger, will also only be played after the click.
The Animation Trigger can also be changed on the "Animations" Tab of the Element Tree:
Video showcasing how to change the animation trigger
Different types of Animations
We distinguish between three different types of animations in snappify Slides:
- Entry Animations: When an element first appears on a Slide (doesn't exist on the previous Slide)
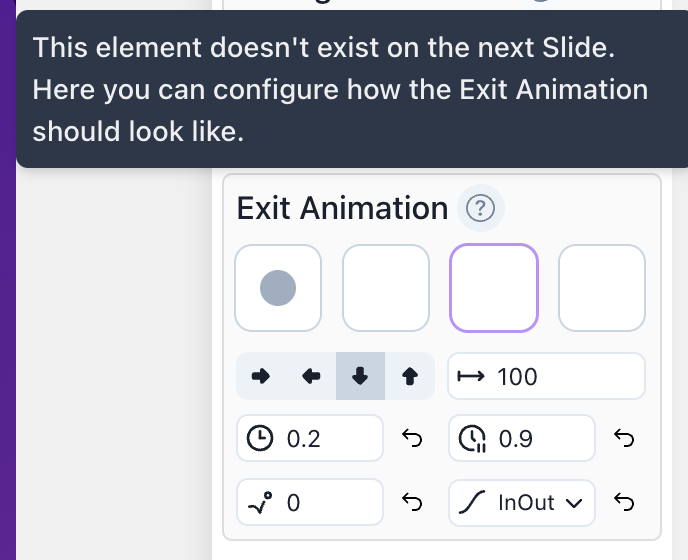
- Exit Animations: When an element disappears from a Slide (doesn't exist on the next Slide)
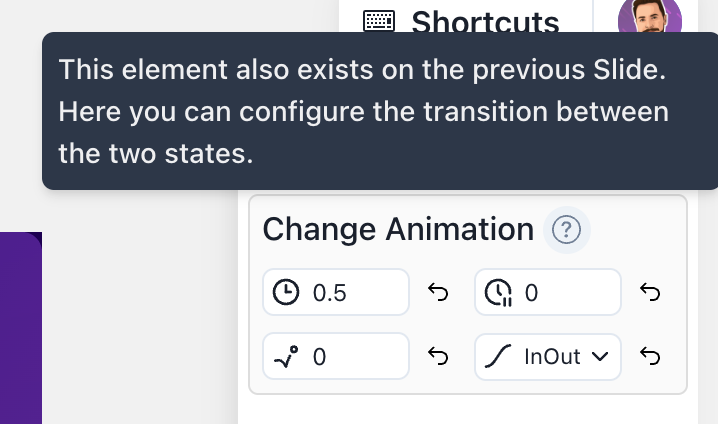
- Change Animations: When an element changes from one Slide to another (exists on the previous Slide)
You'll be able to configure these animations in the snappify Editor when you've selected an element and switch to the Animation tab on the right toolbar. You'll only be able to configure the animations which are applicable to the currently selected element.
For example, if you've selected an element which exists on the previous Slide, you'll only be able to configure the Change animation and not the Entry animation, because it won't have any effect.
Transition Options
On every type of animation, doesn't matter if it's an entry, exit or change animation, you can set the following options:
- Duration: How long the animation should take
- Delay: When the animation should start
- Easing: The easing function of the animation
- Bounce: The bounce intensity of the animation
Change Animations
When an element changes its state from one Slide to another, snappify will smoothly animate the change. For example when you change the position of an element, it will be animated smoothly.
Via the above described Transition options you're then able to e.g. change the duration, easing or bounciness of the animation of the selected element.
But how do we tell snappify that an element is the same on two different Slides? Let's take a look on how to link elements between Slides 👇
How to link elements between Slides
At the moment there are two ways to tell snappify that an element is the same on two different Slides and should therefore be animated:
- Duplicate a Slide: When you duplicate a Slide, snappify will automatically link all elements between the two Slides.
- Copy & Paste: When you copy an element from one Slide and paste it on another Slide, snappify will also link the two elements.
The linking will only apply to the first element you copy or duplicate. If you duplicate an element twice, the second element won't be linked, hence it would have an Entry animation as it doesn't exist on the previous Slide.
Entry Animations
When an element doesn't exist on the previous Slide, there's no state to animate from. Therefore snappify provides you with several entry animations which you can choose from. By default the Fade animation will be applied.
Again you're able to configure the above mentioned Transition options for each entry animation.

Let's take a look at the different entry animations you're able to choose from per element 👇
Fade
The element will smoothly fade in, animating the opacity from 0 to the value which has been set on the element itself via the Advanced Style properties.
Video showcasing the Fade Entry animation
Slide
The element will slide in from the left, right, top or bottom, depending on the direction you've chosen.
You're also able to configure the distance the element should slide in from, corresponding to its destination position.
Video showcasing the Slide Entry animation
Scale
The element will scale in or out from the center of the element.
You're also able to configure the scale distance, corresponding to its destination scale.
Video showcasing the Scale Entry animation
None
No entry animation will be applied, the element will just appear on the Slide.
You're still able to configure the delay of the animation, so that the element will only appear after a certain amount of time.
Exit Animations
When an element doesn't exist on the next Slide, there's no state to animate to. Therefore you're able to also configure an Exit animation for each element.
Basically there are the same option available for Exit animations as there are for Entry animations, but they get applied in the reversed order.
Previous Article
Next Article